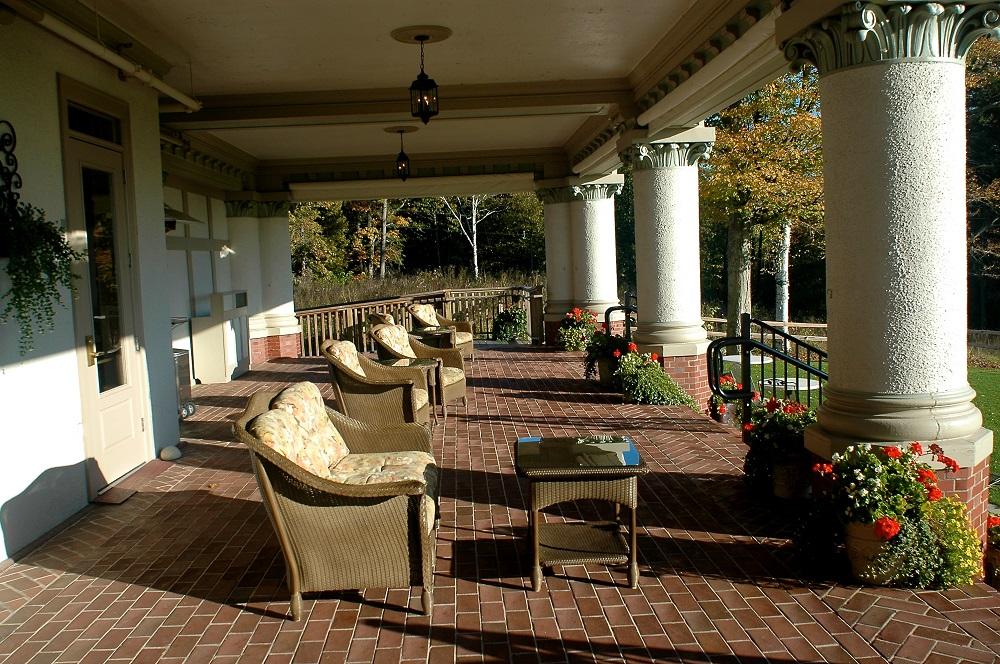
I’m a big fan of verandas and porches, mostly because I feel good when I’m standing on one.
The practical side of my brain follows along by pointing out all the technical advantages that verandas and porches offer. Windows, doors and siding all last longer when under the protection of a veranda roof. And even the structure itself will outlive a comparable roofless deck because the roof partially deflects rain and sunlight, reducing the toll these elements take on wood and finishing products. Eavestrough-equipped verandas are also great at drying up basement leaks since they typically shed rain 6 to 8 feet away from the house. Successfully adding a veranda onto your house (or directing a professional to add one for you) starts with an understanding of design and construction basics. And if it’s all done right, you’ll love what it feels like sitting on your veranda, relaxing, while a gentle rain falls.
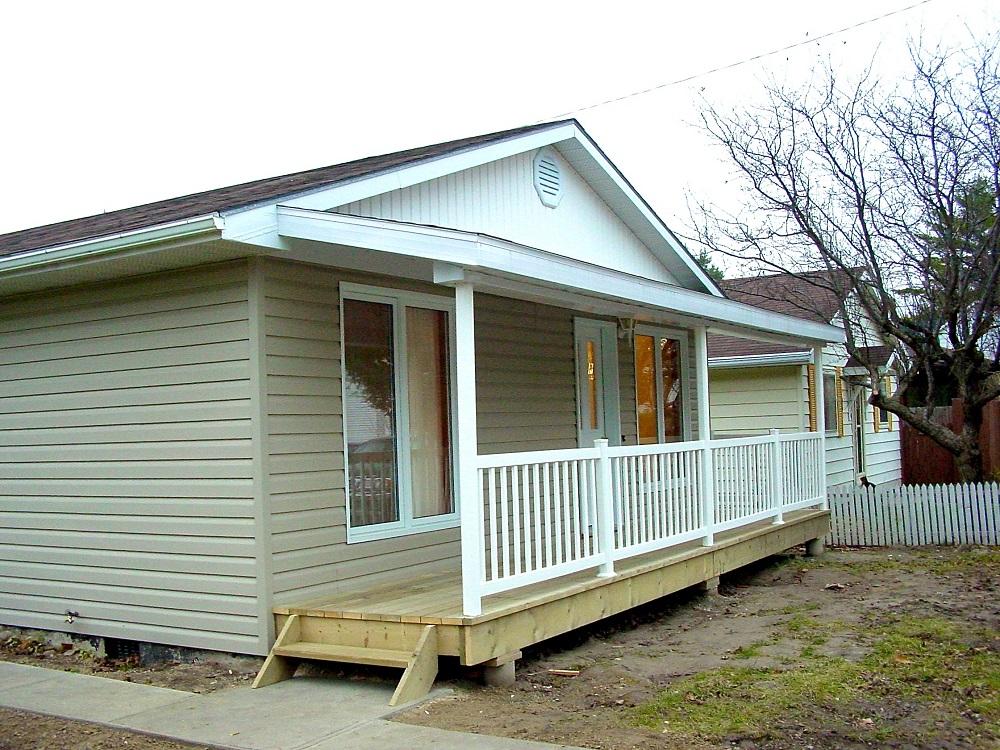
According to the Merriam-Webster dictionary, a veranda is “a usually roofed open gallery or portico attached to the exterior of a building.” Similarly, a porch is defined as “a covered area adjoining an entrance to a building and usually having a separate roof.” As you can see, there are a lot of similarities between the two and my advice that follows covers the planning and design of both structures.
1. Consider Your Design Options
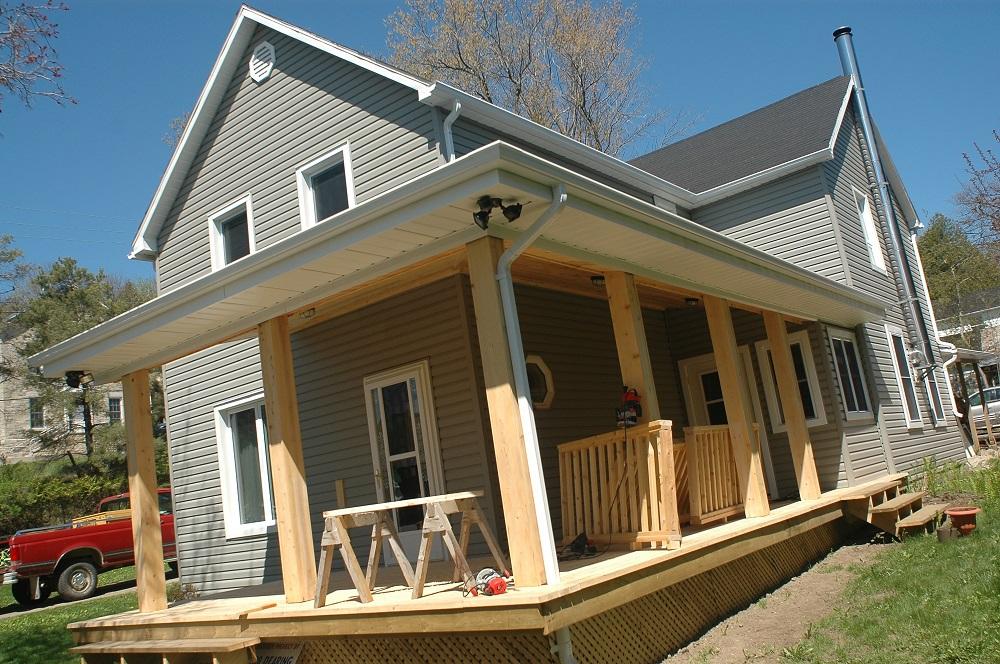
Does your house have what it takes to sport a traditional veranda? The question is largely an aesthetic one, since all the necessary parts can be added to any house. The best place to start your quest for a pleasing design is to search for other houses with verandas you like. Most will probably be 1 1/2- or 2-storey homes, but verandas can also be added to bungalows too. The two most important visual features of a veranda are floor width and roof slope. It’s easy to make an ugly mess if you get these key details wrong for your situation, so do your homework. In fact, the issue of proportions is crucial enough that you should ask permission to measure these details on houses around your neighbourhood that strike your fancy. The easiest way to measure roof slope is by setting a 2-foot carpenter’s level horizontally on the veranda rooftop, then measure the distance between its elevated end and the roof’s surface. This will give you the amount of slope over a 24-inch span. Simply divide this number by two to express the slope as a fraction of 12, which is the standard way of describing roof slope in the trade. Veranda roofs typically drop 3 to 5 inches over a 12-inch horizontal span. You’ll also find that verandas are far narrower than what you’d expect from an uncovered deck. Don’t let this worry you. Six- to 8-foot-wide verandas are typical on homes where a deck that’s twice as wide might otherwise be installed.
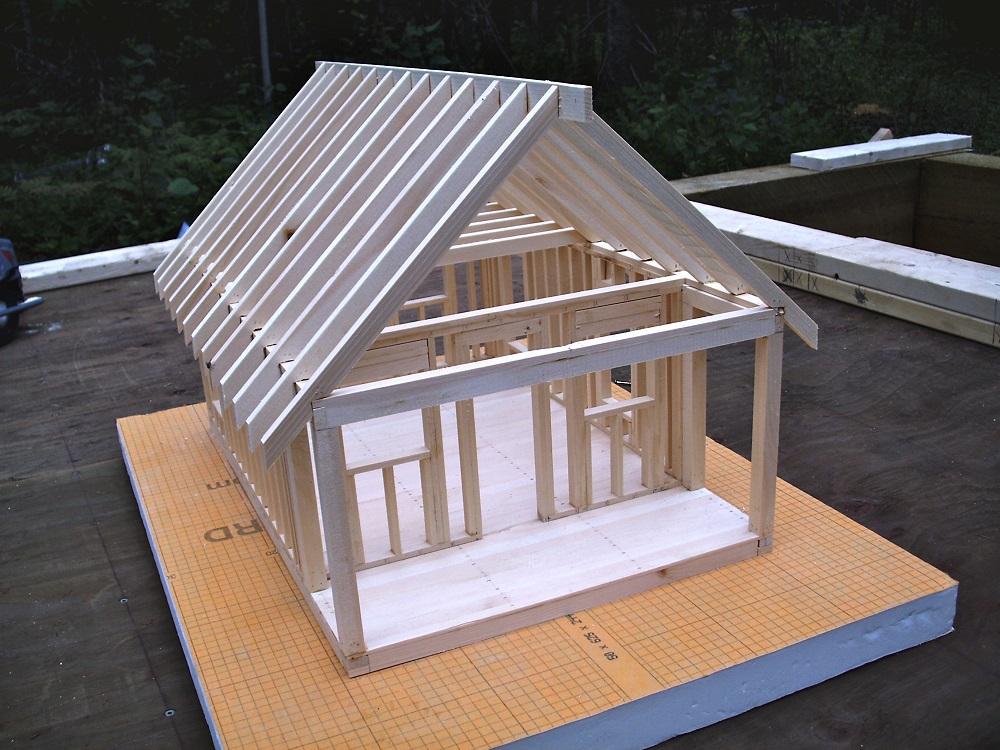
2. Build a Scale Model
Even after seeing and measuring several verandas that you like, adding one to your house can still be an aesthetic gamble because you’re making such a large visual change to the structure. There are two ways to eliminate this risk. First, you can arrange to have a computer-generated 3D-scale image of your house created. Design tools that produce these effects are becoming more common, but you’ll still have to search a bit for someone equipped to help you if this software is new to you. A simpler approach is to build a small-scale model using low-tech materials like cardboard, tape, a hot glue gun and even tiny framing lumber. I prefer this option because it’s easy to involve the entire household in the process, plus it’s especially fun if you let kids in on it. The model needn’t be fancy, just an accurate to-scale version of the outside of your house made from cereal box cardboard or corrugated box board. Use your ruler and pretend that each 1/2-inch segment actually represents 1 foot of your house (1 cm for each 30 cm is a similar scale if you prefer to work in metric). A basic to-scale model won’t take long to build, and it’ll allow you to experiment with different veranda roof slopes and floor widths. The aim is to know exactly what you’re adding to your house visually before any lumber is cut. It’s wonderful to move ahead with the confidence that this exercise inspires.
3. Determine Construction Details
You’ll have to pay more attention to the footings of a veranda than those of a deck because the seasonal wood movement that could occur with a marginal foundation is more critical when you’re supporting a roof. The best type of veranda footings are concrete piers that extend down below the frost line under each roof support post — 48 inches is a safe footing depth in most places in Canada.
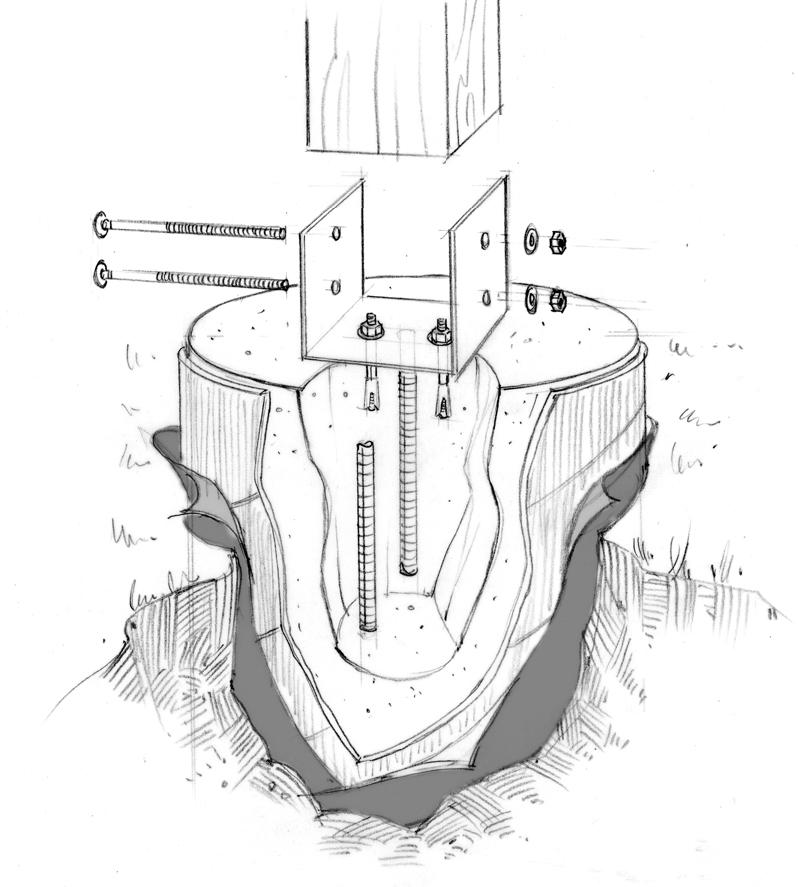
Hot-dipped, corrosion-proof metal brackets, called post saddles, are set into the top of these piers when the concrete is still wet, forming an anchor for the 6×6 or 8×8 posts that’ll support the roof. It’s best to also bolt these brackets down to piers after the concrete has cured to help resist the strong upward force of the wind when it gets under the veranda roof. Don’t use pre-cast concrete deck feet to support a veranda, since the downward loads are too great and offer no resistance to wind uplift of the roof.
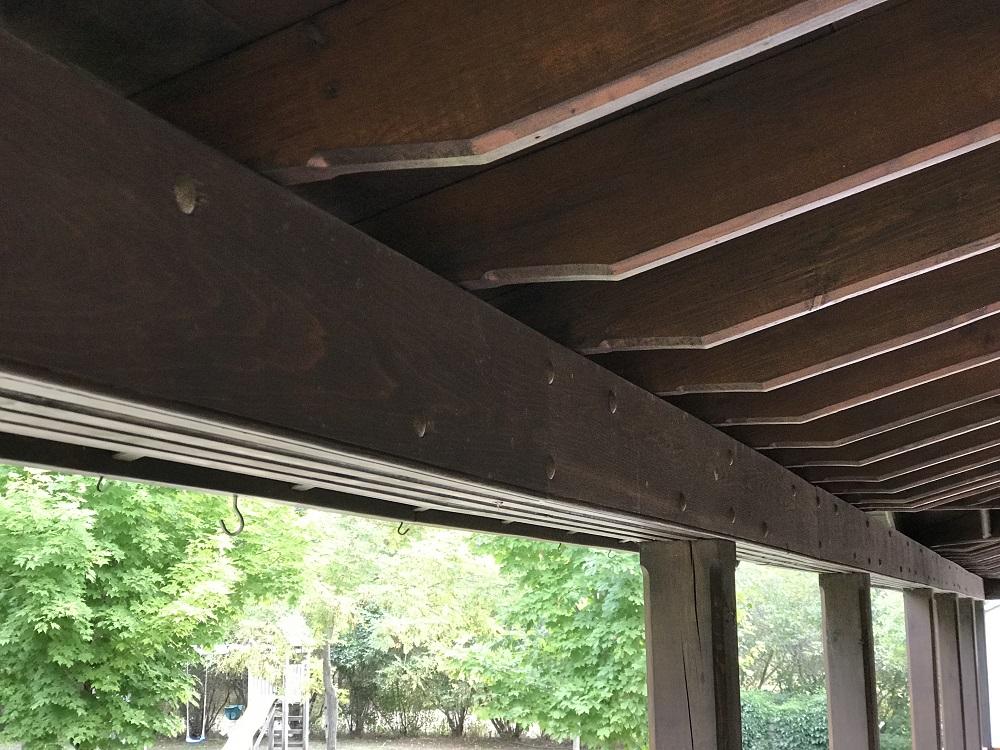
4. Plan the Roof & Pre-finish the Rafters
Verandas built 70, 80 and 100-plus years ago typically had a wooden ceiling applied to the underside of the roof rafters, but experience has shown that this can promote rot by trapping rainwater if it leaks past the shingles and flashing. It also adds a lot of expense in materials and labour. An easier alternative is to frame the roof of your veranda with standard 2×6 or 2×8 rafters, sporting routed edges to improve their looks. It’s amazing how pretty construction-grade lumber can look when it’s treated with a little artistic care. Since the underside of the veranda’s roof sheathing remains visible in this design, it’s much better to use solid wood planks (rather than plywood) for the roof deck. Pre-finishing the rafters and roof boards before installation saves you the enormous hassle of overhead painting.
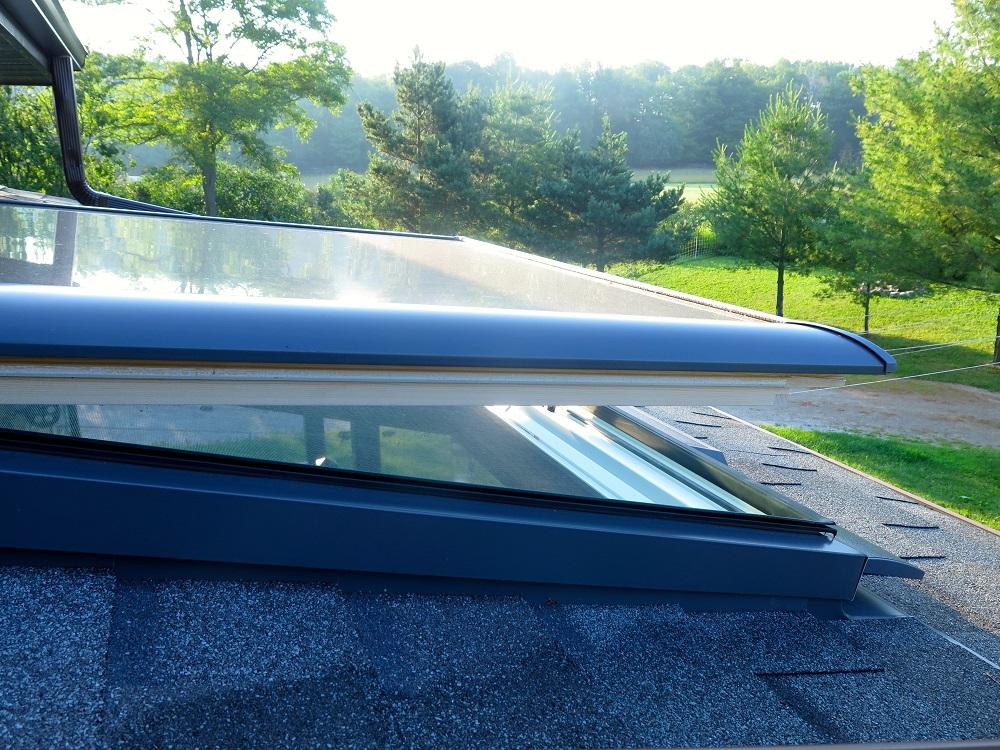
5. Consider Adding a Skylight
Adding a veranda can darken the inside of your home if its roof shades major windows. Eliminate this problem by installing skylights in the veranda roof, right over those important windows. Be sure to make these skylights openable, not because you’ll need the ventilation, but to let bugs out in summer. Flying insects of all kinds congregate under the glass of skylight if they can’t fly out.
If you get rid of the screens, even an inch or two of opening is enough to keep the window clear of bugs most of the time. The open roof of a veranda does a better job at extending the outdoor season than any deck, and here in Canada we need all the help we can get enjoying the outdoors. Revive the idea of a covered veranda at your house and you’ll see why these things were a standard part of house design for centuries.
Steve Maxwell and his wife Mary live on a 90-acre modern homestead on Manitoulin Island, Ontario in a stone house they built with local materials beginning in 1985. Steve is Canada’s longest-running home improvement and how-to columnist and editor of Home and Property. He divides his time working on the land, building things large and small, and creating articles and how-to videos that teach sustainable, self-reliant, hands-on living skills.