I purchased this Tiger Bark Ficus microcarpa as a pre-bonsai in 1997, and had worked on it for about 19 years. Over these years, it transformed from an ordinary looking pre-bonsai to one which won a place among the 25 Exceptional Tress Award in the 2013 World Bonsai Friendship Federation (WBFF) Photo Contest. It also won the Best Tropical Bonsai and Best of Show awards in the 2014 Lone Star State Bonsai Convention. I thought I would document its journey; and shared what I had learned working on this tree, both the good and the bad, and what would I do in the future to improve it.

When I was shopping for a pre-bonsai in the nursery, this tree caught my attention because it had a rather big trunk base, about 3″, and it tapered nicely with a low first curve suitable for a moyogi style bonsai. Although the front looked good there was a severe flaw at the back, the back trunk base beveled inwards, no exposed roots at all. The whole tree looked highly unstable as if it would fall backwards with a slight push. Several large and disproportionate branches were at undesirable positions for a moyogi bonsai design. The attractive part of this pre-bonsai was the good looking front with a tapered trunk. It was also inexpensive and had potentials.
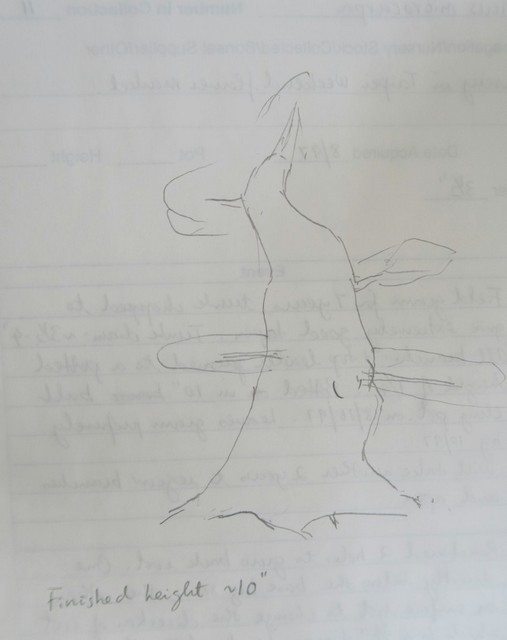
Since ficus grows reasonably fast in our Zone 9 weather, I decided to cut off all the branches and re-grow them. When new shoots popped out I kept only those that I wanted for my envisioned design. After lopping off the top and all the branches, all that was left was a 7 3/4″ tall stump. When I looked back at the sketch in my 1997 notebook, I had envisioned it to have a final height of ~10”. I was very wrong! It is now about twice that height.
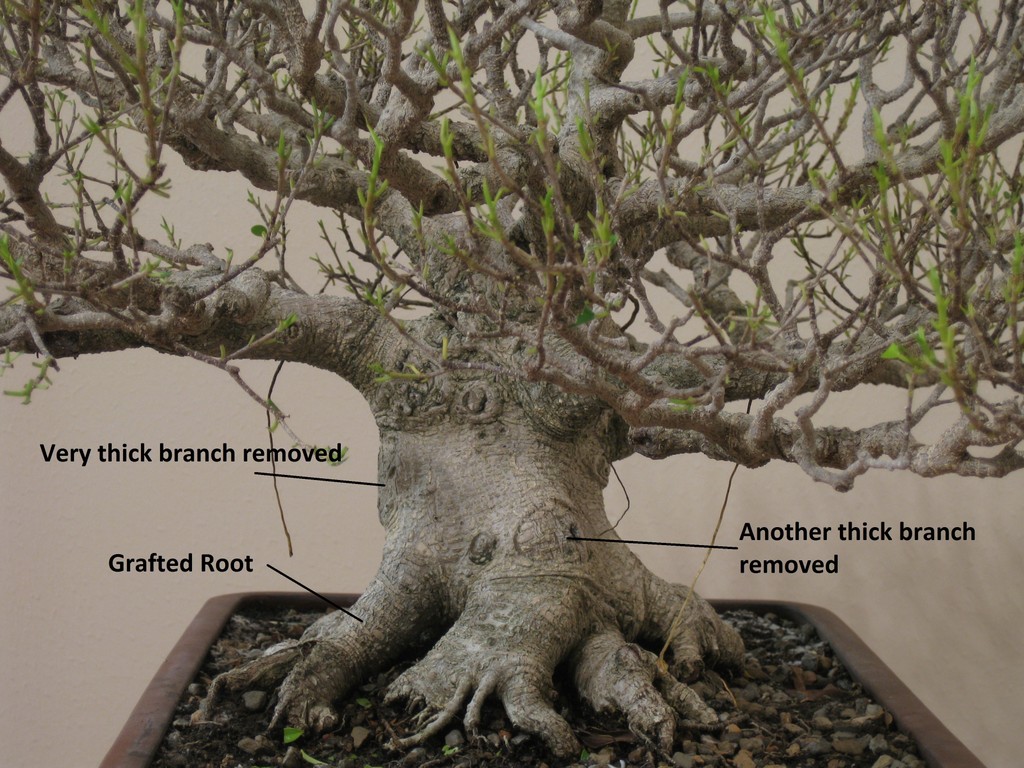
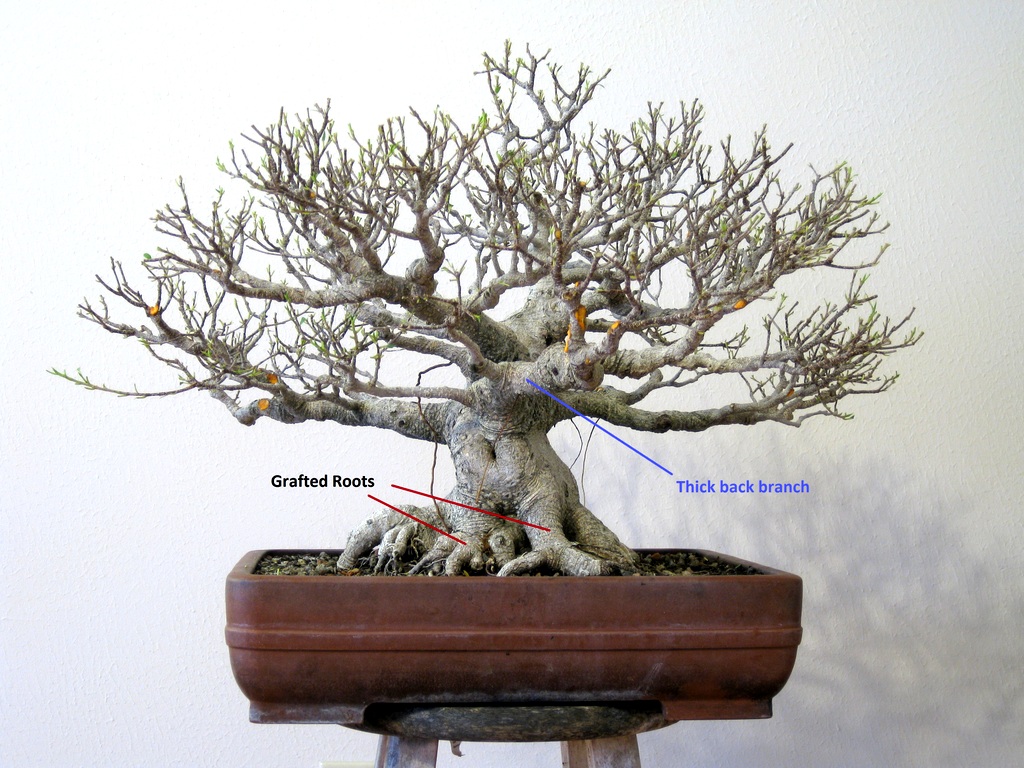
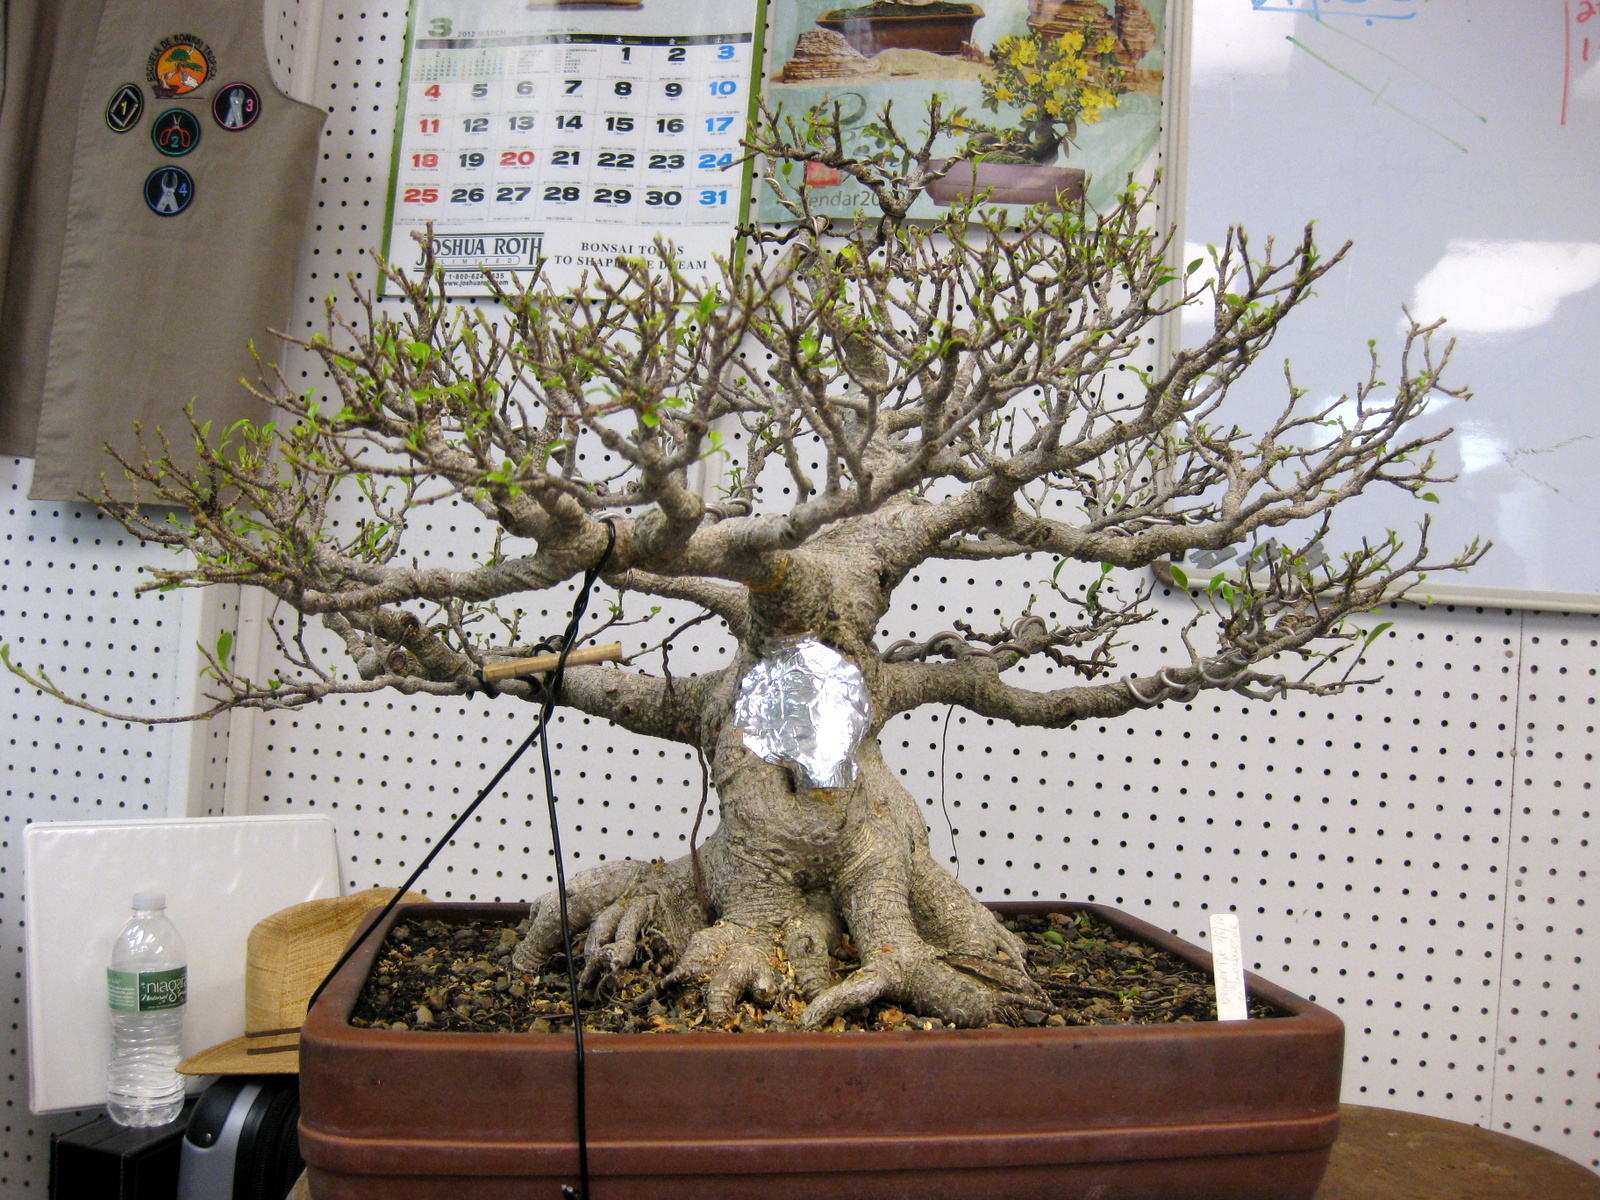
To correct the back’s undercut trunk base, I grafted two small seedlings rooted from this tree to fill up the beveled gap, and to develop the back nebari. This 2012 photo shows the already well developed grafted roots and the scars left from the chopped off the original large branches.
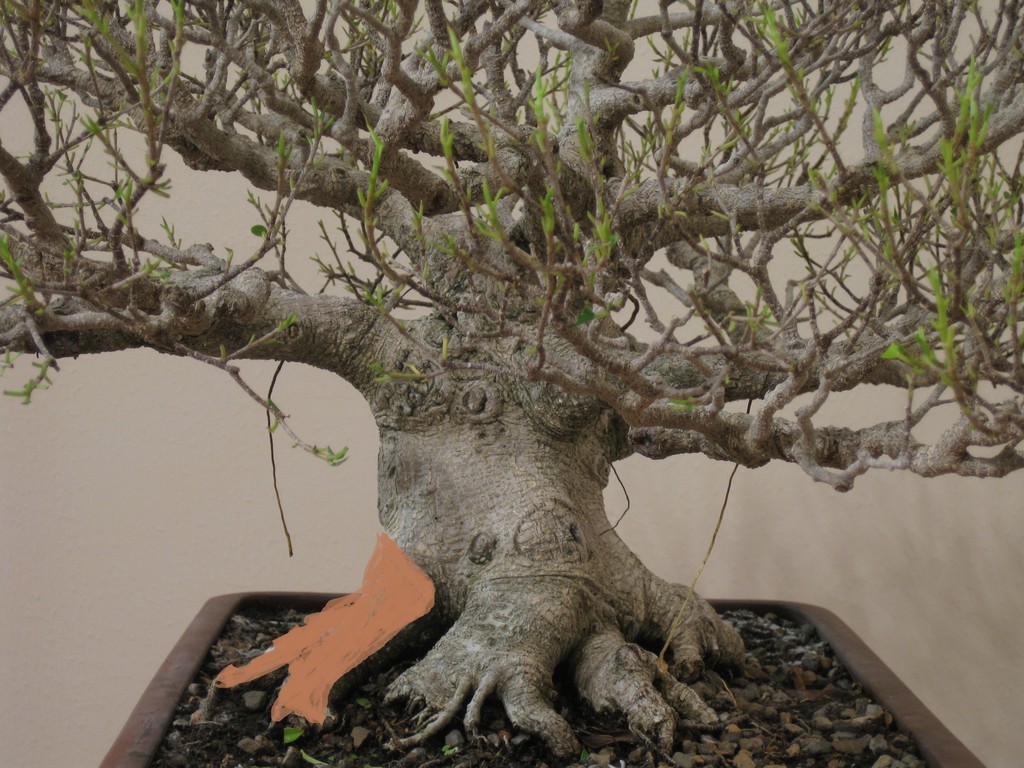
Since I do not have photo of the original pre-bonsai, I wiped out the grafted root of the above photo to show the beveled trunk base at the back of the tree.
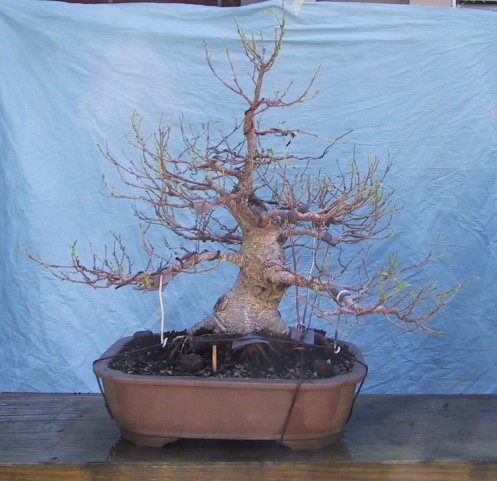
After developing the basic structure from new growths, I let the tree grew, developed new leader and branches. This is how it looked in May 2001. I do not have photos of the tree between 1997 and 2001. That was before I have a digital point-and-shoot camera; there might be print photos somewhere in storage boxes.
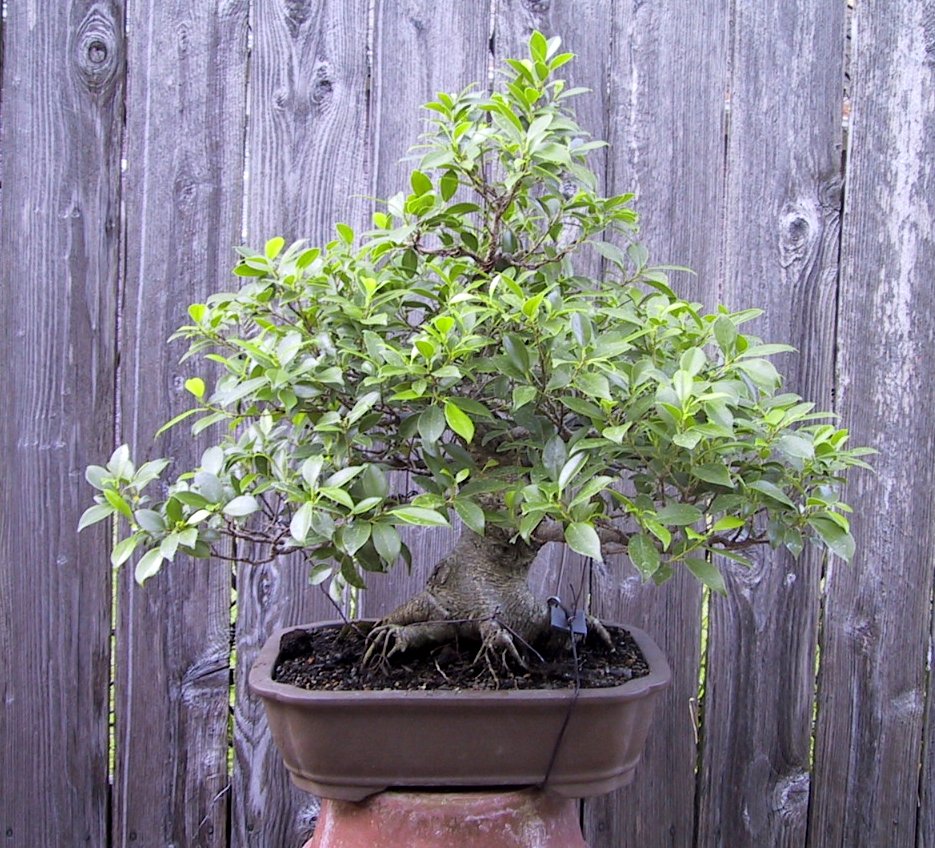
I fed the tree aggressively with homemade organic fertilizer consisting of cottonseed, bone and blood meals. This is how it looked in May 2008.

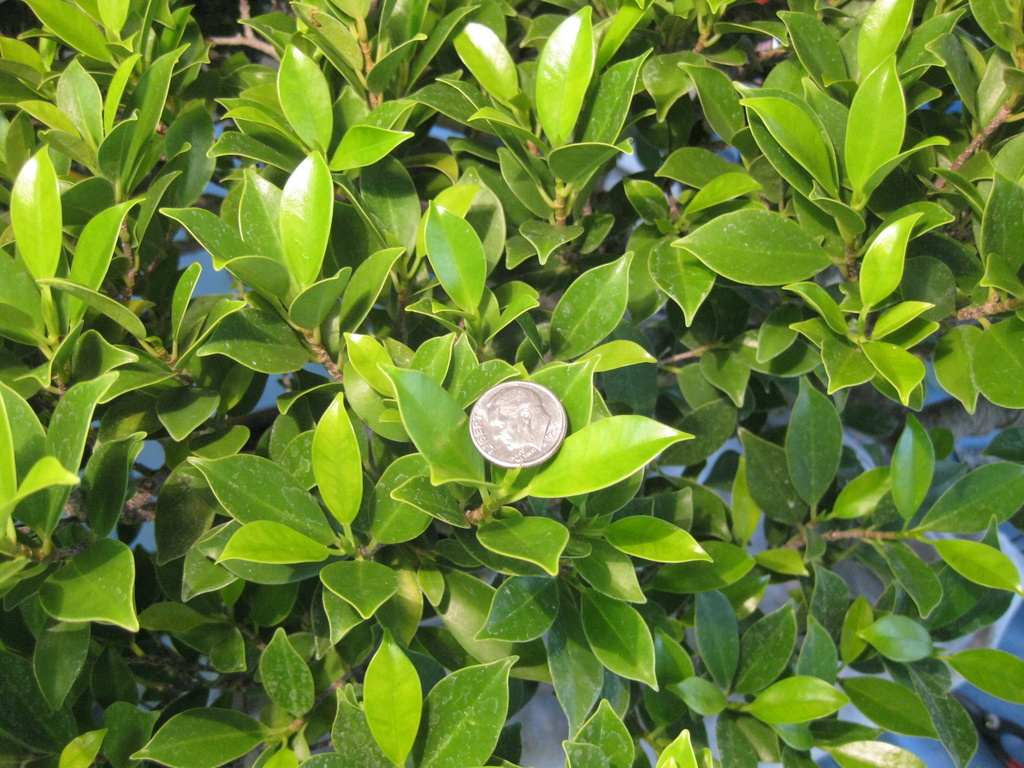
To develop ramifications, I defoliated the tree once and occasionally twice a year. With defoliation, the leaves also reduced in size. A dime was placed among the leaves for comparison.

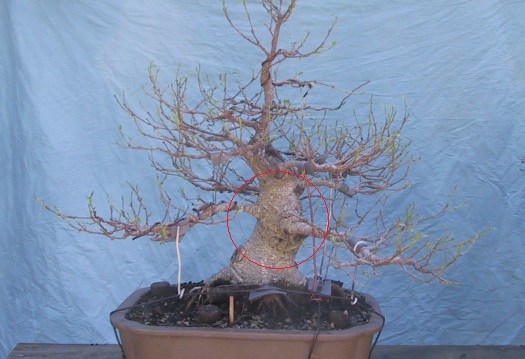
Grafting two roots to the back did improve the nebari but they also created an unexpected problem. The lowest back branch grew so vigorous that it became the thickest branch, about 1¾” in diameter, of the whole tree.
In 2012, I attended Pedro Morales’ Tropical Bonsai School, and discussed this problem with him. He suggested I removed it completely and brought down the next higher back branch to fill up the gap. Wow! That was not an easy decision to remove a big branch on the spot. This branch was 15 years old.
I was cautious. Since I have photos of the defoliated tree, I used Window’s Paint to white out the back branches. Below is the simulated front and back, and they did not look that bad at all without that back thick branch.


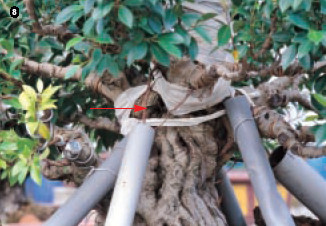
The next morning in class I took out my saw and that big back branch was gone. The higher back branch was also quite thick, I cut a groove with a pruning saw at the bottom of the branch where I wanted to bend, and brought it down with guy wire until the groove closed. You can see the orange cut-paste where the groove was cut.
Pedro liked this tiger bark very much and thought it was worthy to try out in a judged show. He suggested I entered it for the 7th WBFF photo contest; he told me it would be nice to be selected as one of the North American participating trees. I have never entered any bonsai contest before, even locally, and this is a world event. Well, he is the maestro. After hesitating for a long time and waiting for the tree to fill up with foliage again, I finally took the photo and sent it to the North American Region coordinator just a few days before the deadline. Low and behold, it was selected as one of the North American entries to this world event.
The 7th WBFF convention was held in Jintan, China, September 25-27, 2012. Only one tree can be submitted per person. Each region can select up to 30 trees for the final world contest which is judged by a panel of international judges. Points were awarded, and the best five trees were chosen. The grand winner went to Japan. The next 25 highest point trees were awarded the Exceptional Trees accolades, followed by Honorable Mentions. There were actually 36 trees in the Exceptional Trees category since some were tied in points. My tree just barely made it to the 25th place of this category, sharing it with Hans van Meer of the Netherlands. This is totally unexpected; I would be very contented as one of the chosen North American entries, never had thought it could go that far. Looking at the winners, they read like who’s who of the bonsai world. Here, a hobbyist just barely made it.
The encouraging lesson from working on this ficus is even for a cheap pre-bonsai, as long as one recognizes its long term potential, with time, training, loving care and good horticultural practice it can be grown into a beautiful tree. There is no short cut. I started with an envisioned 10-inch tall pre-bonsai, it ended up at over 19+” tall and a spread of over 30” from left to right.
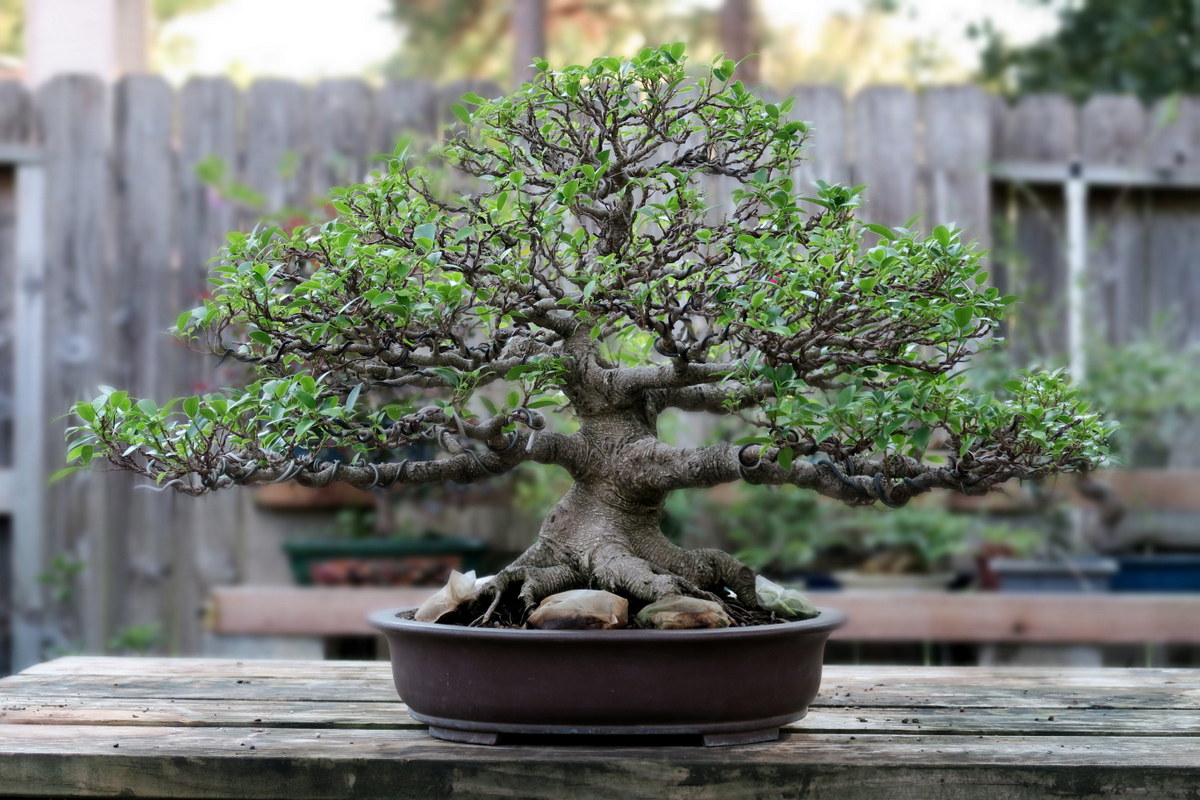
I have since reworked the tree by bending down some branches. This is how it looked in September last year, about two months after defoliation.
The rest of the post is to share what I have learned working on this tree over the last 19 years, what would I do differently and what would I do to further improve it.
Learnings:
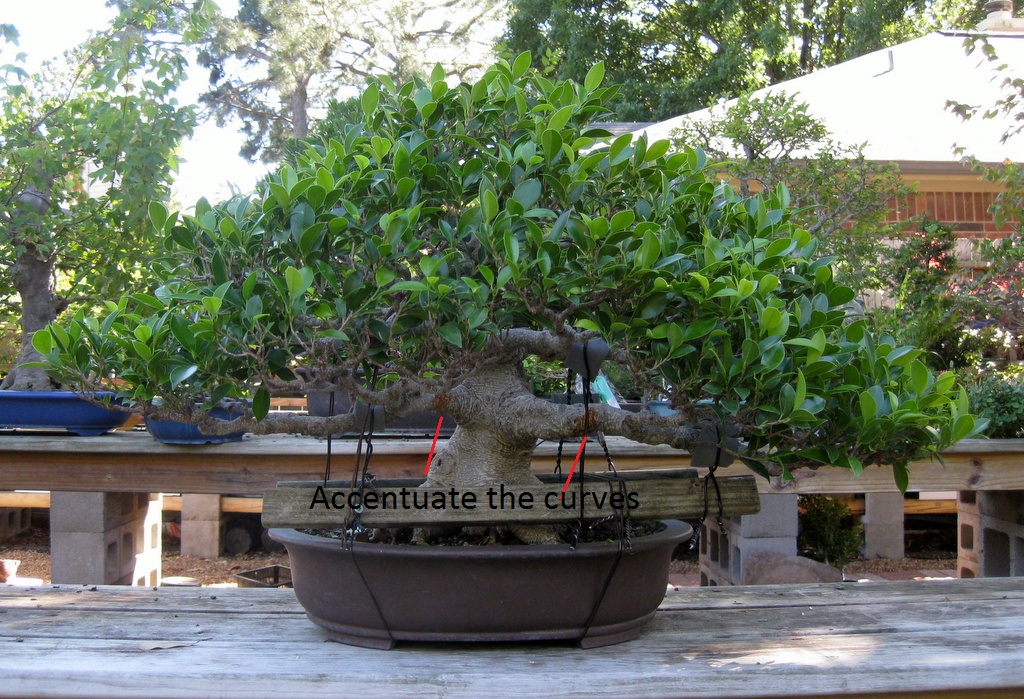
- Distance Between the Primary and Secondary Branches
When I regrew those new branches, vertical separation between the primary and secondary branches looked fine, they were well separated. As the thicknesses of these branches increased, two things happened:
- The curves put into those branches became less and less prominent.
- Visually, the vertical separation also diminished and they almost looked like bar branches, although the separation is still there. Fortunately, this is a ficus where bar branches can be tolerated to some extent based on its umbrella shape canopy and growth habit. So it is advisable to give enough vertical separation between branches to allow for future thicknesses and when you want to have a bigger tree than envisioned.
To break up the “near” bar branches look, I bent both branches to accentuate their curves to give them a little more movements, and less of a straight line.
- Roots
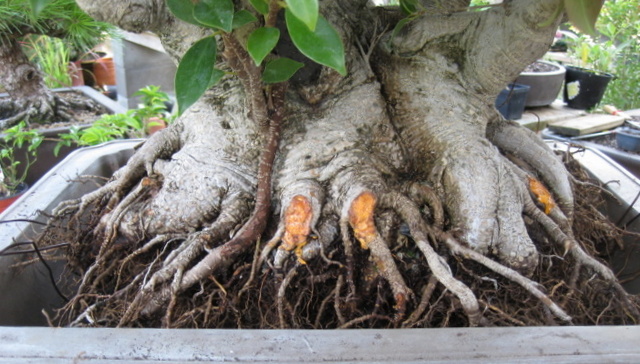
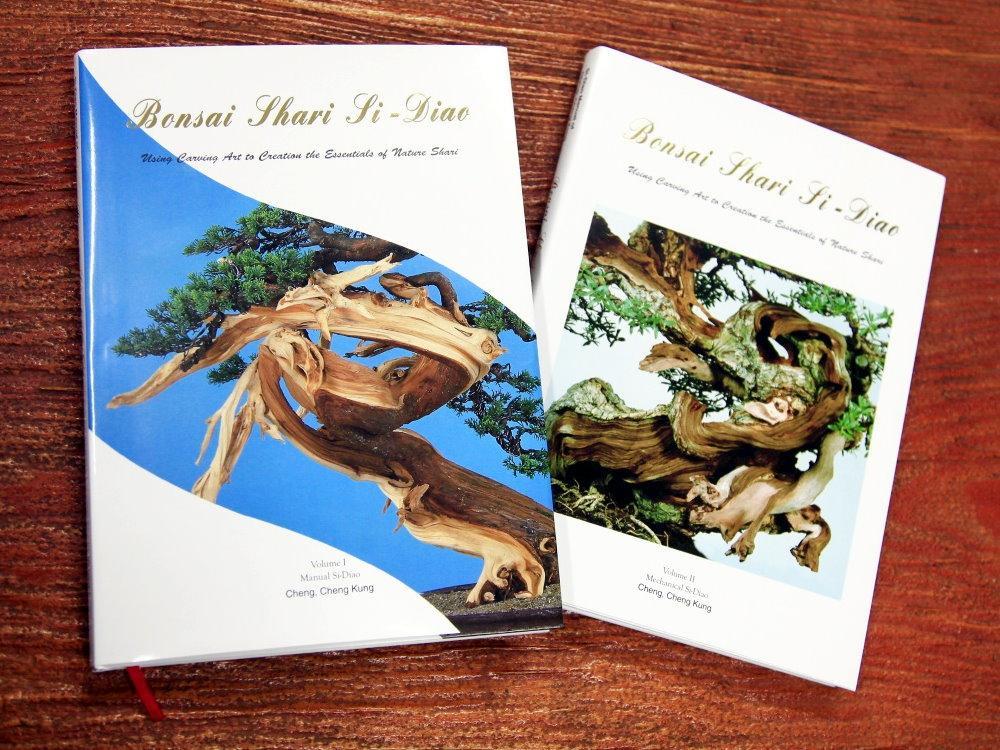
It is nice to have a large radially spread exposed roots. However, ficus roots grow so fast that they can become too big compared to the trunk size. When it comes to cultivating ficus bonsai, none are better than the Taiwanese bonsai masters. I learned from them by reading their books and internet posts (See for example: Bonsai Shari Si-Diao, Volume II, by Cheng Cheng-Kung, 2004, ISBN 957-41-2131-3). In fact, an important task in the maintenance of old and mature ficus bonsai is to reduce the root size, balancing it with the trunk and overall appearance. This may sounds counter to what we sometimes see in Japanese maples with large plate-like nebari, these types of nebari are not desirable for ficus bonsai according to these Taiwanese masters. When the roots beomes too fat or bulging out, they
- slit the thick roots into two or three strips to create thinner, flared roots;
- chiseled out a large section of the surface roots to regrow finer roots; or
- cut-off the fat roots and graft new skinnier roots.
These two photos of root maintenance were from Cheng Cheng-Kong’s Sidiao webpage: http://www.sidiao.com/Ficus_e.htm


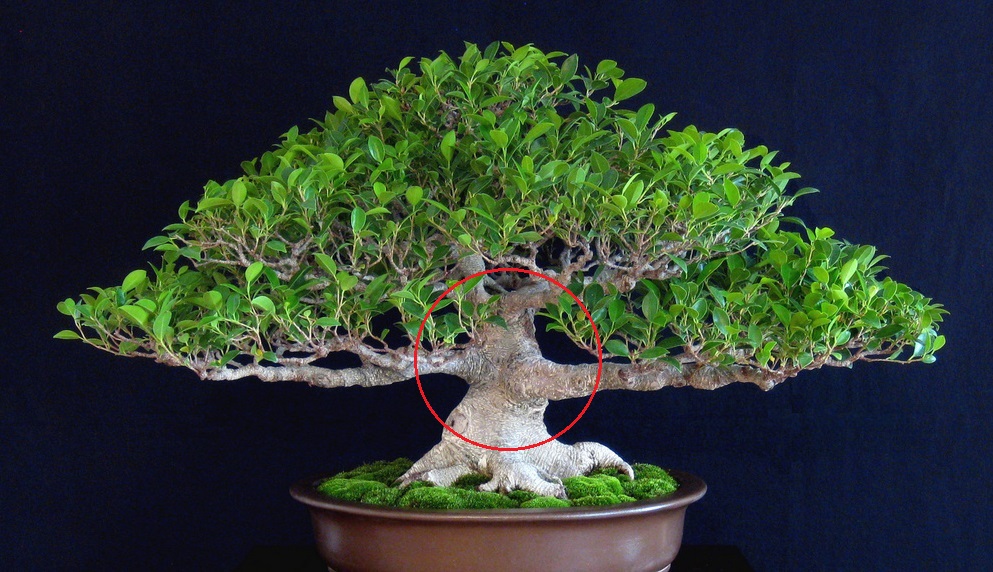
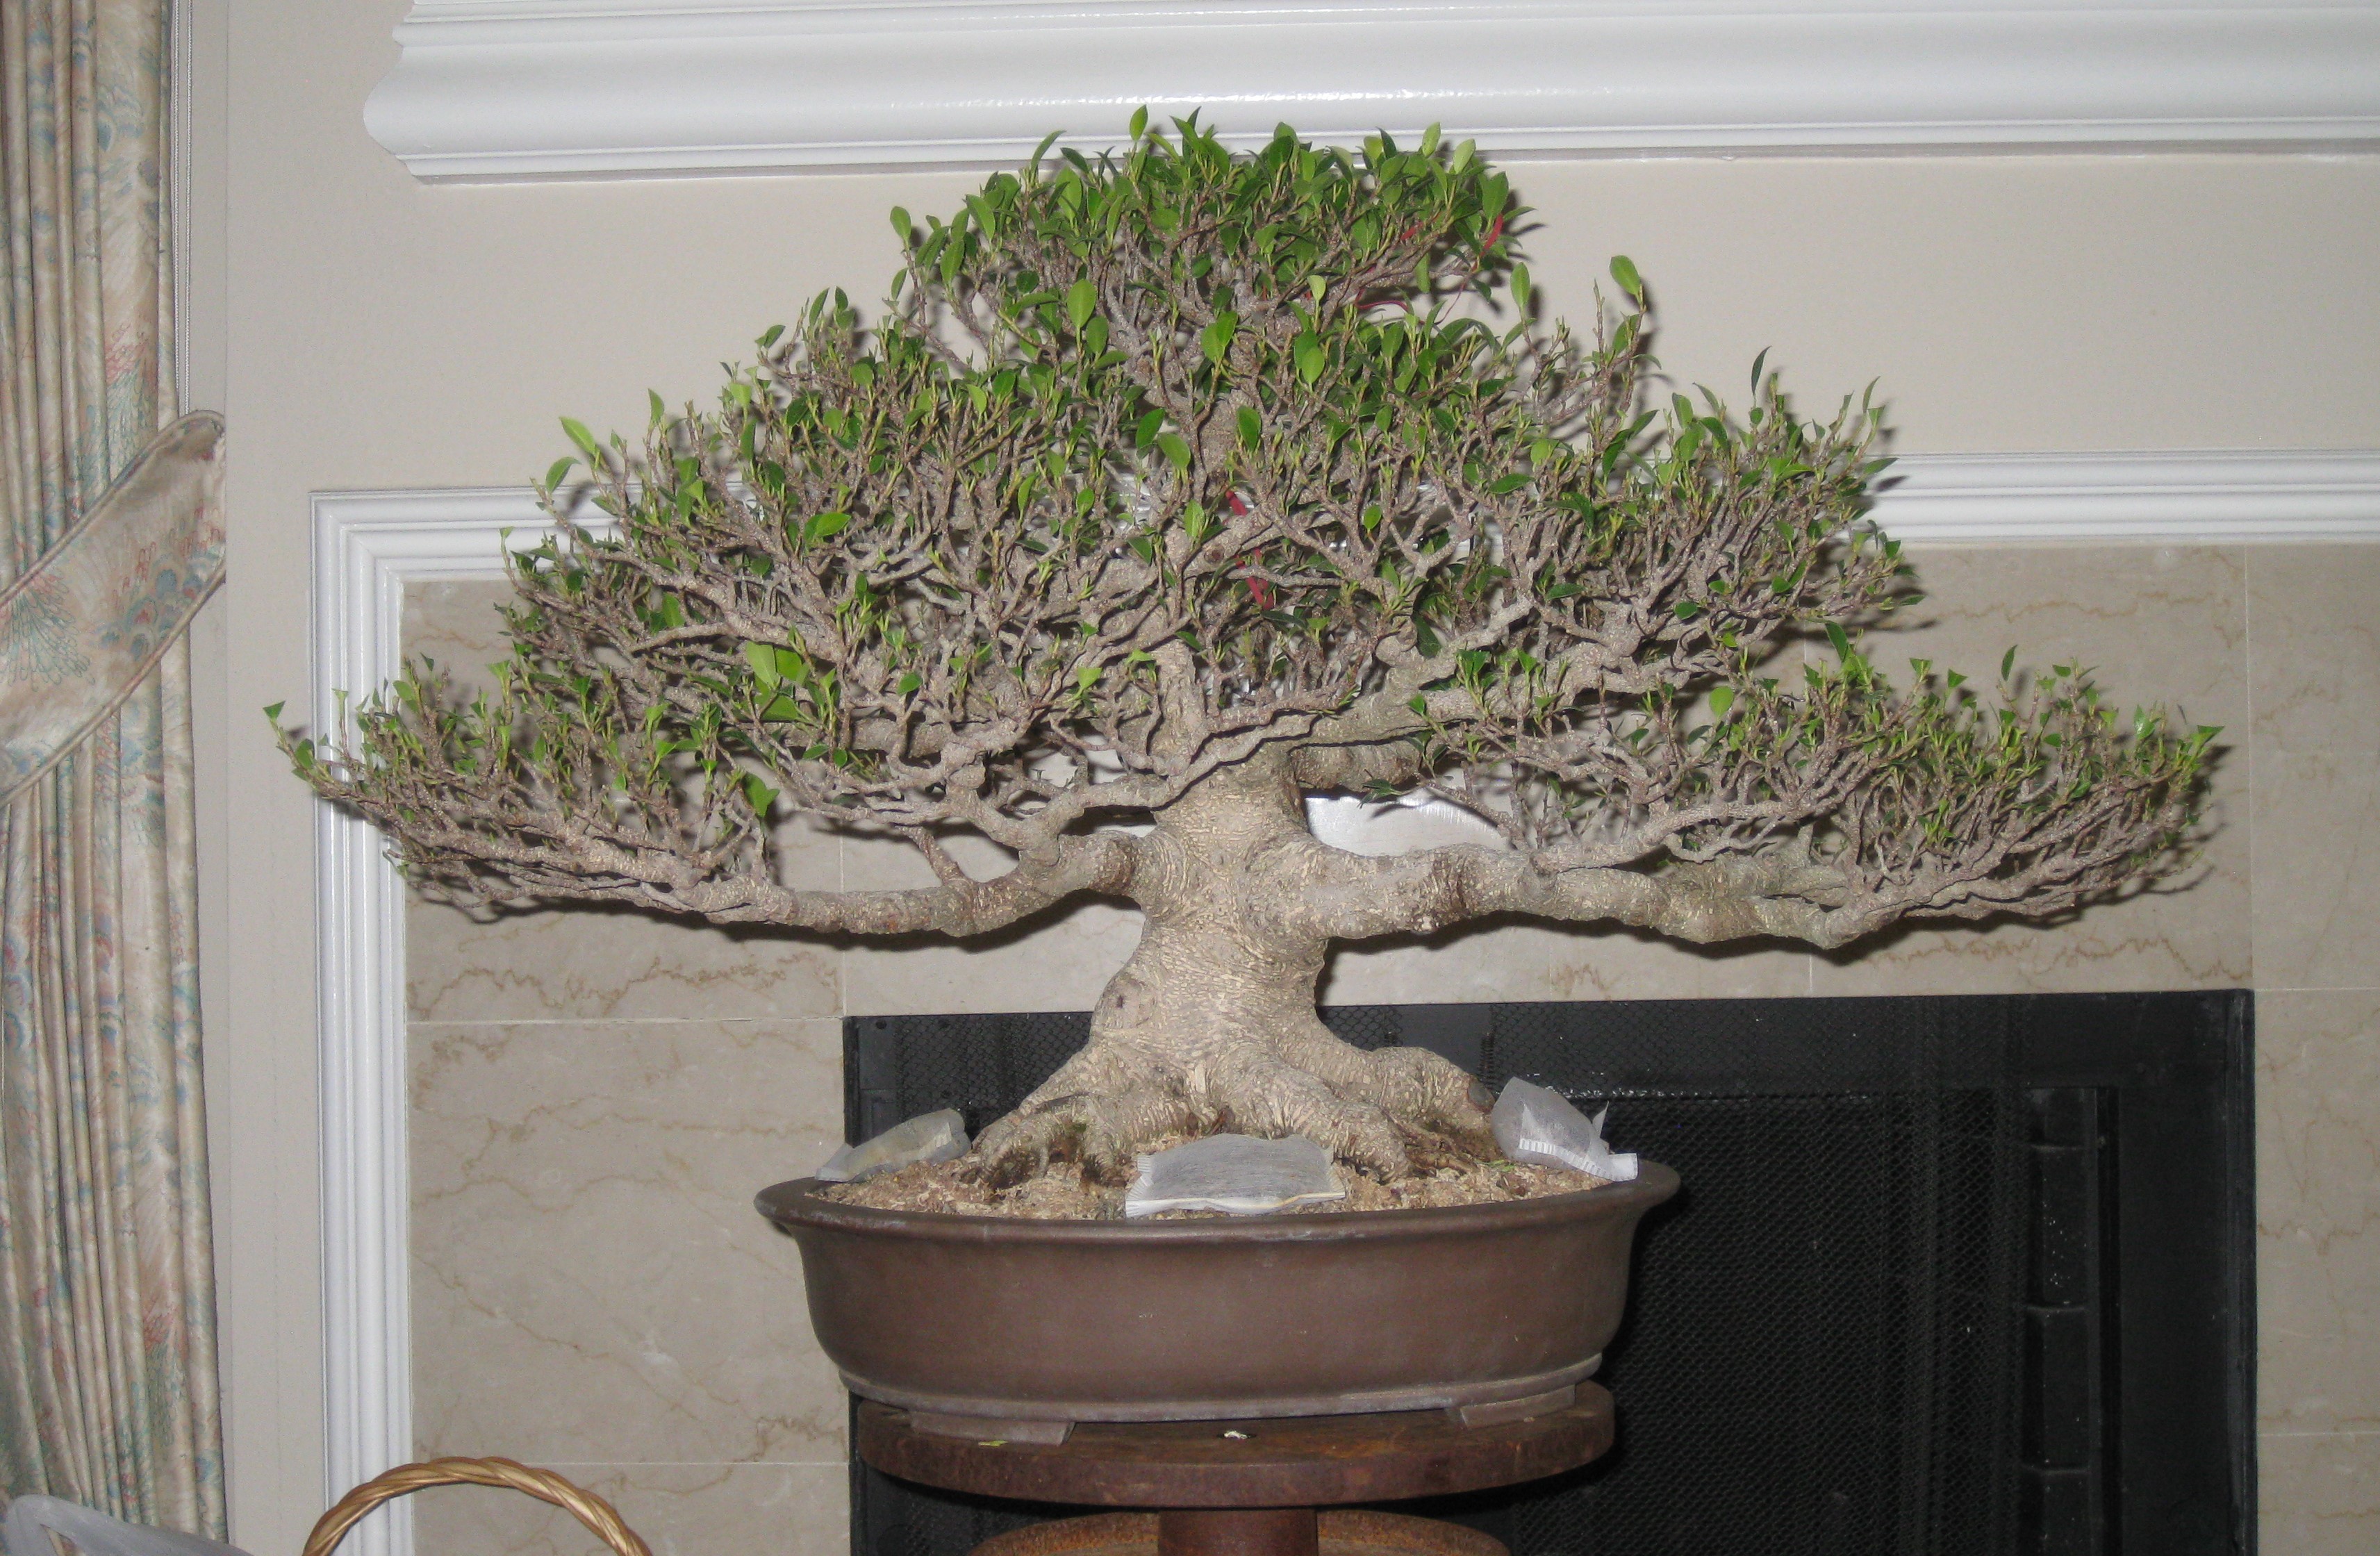
- Top Half Section of the Main Trunk
It may be a surprise to hear this: growth of ficus bonsai is weaker at the top than at the bottom. This is true. Looking at the photo of my defoliated tree, the top one-third is not fat enough, somewhat disproportionate to the trunk and thickness of the lower branches. Although this weakness is not apparent when the tree is full of leaves, but ficus is often shown defoliated, and the long neck becomes apparent.
To correct this, in the future I will either fuse some seedlings to thicken the neck or grow a bunch of aerial roots with heavy feeding to speed up the girth. One method is to pass the aerial roots through long PVC pipes and let them reach the ground to accelearate the process.
To do the above, especially correcting the fat roots and thickening the long neck, I will not show the tree for several years, concentrate on improving the faults and let it grows more vigorously. It is not a good thing to put a tree in shows too often as we need time to make improvements and correct various defects.

Great post. Thanks for the detailed explanation.
You are welcome. Glad to share my learning experience.
Reblogged this on Wolf's Birding and Bonsai Blog.
Thanx for one of the best posts ever.
Thank you for sharing the blog. I am glad to share with everyone.
Reblogged this on Indiana Bonsai.
Thanks for sharing the blog.
Reblogged this on Scratch Bonsai and commented:
Some great learning points in this progression!
Thanks for the post and some great information to consider when developing prebonsai material. I had never considered your point regarding branch thickness and implications for vertical spacing.
Thanks for reblogging. In the post I did not elaborate when the tree is viewed in person, those two branches, with their movements and originating at different angles from the main trunk, are sufficiently distinct that they do not appear like bar branches as in the photo. This is because in a photo, a 3-D object is flattened into 2-D, all the forward and backward curves are projected into a straight line. For the up and down branch movements, if they are not sufficiently pronounced, will also diminished and merged with the straight line in a 2-D photo. In human eyes, we have a depth perception. We also do not look at a tree at a fixed position like a camera, we tilt our head, move a little, and the image becomes quite different from a photo and is more lively.
I realized this after taking the photo. To correct that 2-D bar-branches perception, I bent these two thick branches somewhat to accentuate the curves so they do not appear that straight. The is perhaps the best I can do for the tree grown to this stage without taking a big risk of a major operation.
I once read that some professionals, after styling a tree, will stand back and look at it with one eye shut to simulate the 2-D effect like the tree is photographed. I can’t do that effectively. Some times I take a photo after wiring to see how it looks as a 2-D object and readjust the wiring here and there to make it look better if I need to photograph the tree in the future.
I’ll too consider that in future, thanks!
Also want to mention there is an article by James Smith, a famous ficus bonsai master from Florida, in a 2007 BCI Ambassador’s Newsletter on styling a banyan ficus:
Click to access 9_07DM.pdf
Quoting his article:
“STYLING
Because Banyans are so unique, many of the rules for classical, Japanese-style bonsai do not apply. The tree starts as a single trunk, but may divide into several trunks. It should be twice as wide as it is tall. The canopy spread from side to side should be slightly longer than from front to back. The foliage should
start at one-third the height of the tree. These ratios can be adjusted somewhat to suit the individual tree. Miniature air plants can be attached to the trunk and branches to give the appearance of a Banyan in nature.
When choosing a plant for this style, look for a thick trunk with strong surface roots, low branches and aerial roots. Bar branches are acceptable, preferably with the two lowest branches coming slightly forwards, and one branch extending to the rear. Bar branches can really help define the flat bottom that is
essential to a good canopy structure. Branches are not arranged in a specific order as we see in conifers and some broadleaf trees, although they should become smaller as they spiral around the trunk to the apex.”
What a great journey,it’s a masterpiece.
Thanks! Love to see your new blog.
Reblogged this on assortednoveltrees and commented:
Simply amazing transformation.
Thanks Joe for reblogging. Hop to see you some time soon.
Pingback: The 5th US National Bonsai Exhibition | Bonsai Penjing & More
Hi There
Posted link up on Bonsai South Forum Australia, under ficus section.
Very interesting and educational journey, many thanks.
JC
Thank you John for linking it with Bonsai South Forum. Last September, this ficus won the best tropical award at the 5th US National Bonsai Exhibition, on its’ 20th year since I began the the journey. It looked better with each added year. You can see the tree in my post on the national bonsai show, the 17th photo down, with John Noga, the show official photographer, taking photo for the commemorative album.
Pingback: Defoliating Ficus Bonsai | Bonsai Penjing & More
Pingback: Defoliating Ficus Bonsai – BonsaiPorn
Wow, what an amazing journey!!! This is very helpful for a newbie like me and I am learning a lot from what you have shared. Thank you!
Pingback: How Did Tiger Bark, Kinmen, Golden Gate Ficus Get Their Names? | Bonsai Penjing & More